Zero Dependency Feature Flags in Remix
Have you ever authored a new feature for your application and then waited a week or longer to release it? The marketing team hasn't finished their email campaign, or a product manager wants to wait for another team to complete a companion feature. There are many reasons why complete code may sit in a feature branch for weeks.
Instead of keeping a feature branch alive and dealing with a steady stream of merge conflicts, I'd advocate for releasing the feature behind a feature flag. With a few lines of code, any developer can add a feature flag to a Remix application with zero dependencies.
What are Feature Flags?
A feature flag is a technique to show, hide, enable, or disable a feature during runtime. They can be as simple as a boolean value used to show or hide a feature, or as complex as a 3rd party integration that enables different features for subsets of users.
This article will focus on two use-cases: showing or hiding a particular feature, and controlling access to a page of an application.
Managed Services
Before diving into a coding example it's worth mentioning that there are many great services for managing feature flags. Optimizely, Split.io, Launch Darkly, and DevCycle are a few services I've used or evaluated in the past. These services provide scalable solutions that are suitable for complex use-cases and development environments. Teams that pay for these services tend to manage many feature flags and run multiple experiments at once.
What are we building?
A simple inventory application for an IT department built with Remix, React, and Typescript. We'll implement zero-dependency feature flags to enable or disable specific features and pages. I'll demonstrate how to load environment variables into an application, set up a context to use them client-side, and use http responses to control page access.
Requirements
- An app to display a company's IT inventory.
- The app should display a list of items with a title and details.
- Each item has a SKU, but this property is hidden behind a feature flag.
- This feature is controlled by the
SHOW_ITEM_SKUfeature flag. - When the value is false, the SKU should be hidden.
- Each list item should be clickable. When clicked, it should navigate to a item details page.
- This page is controlled by the
SHOW_ITEM_PAGEfeature flag. - When the value is false, the item should not be clickable and the route should render a 404 error if accessed via URL.
I used CodeSandbox to create this demo. You can also refer to this Github repository. The readme in the repository will explain each commit. You can refer to specific commits to isolate different changes.
You can view this commit message for initial setup of the project: Commit #1
Setting up the project
First, let's set up some of the basic piece of the inventory application. Let's display the inventory for an IT department as a list of items. Each list item will display an item's title, description, quantity, and location. First we'll define the type for an inventory item. Then we'll define the JSX for a list item.
// app/types/inventory.ts
// Type definition for an inventory item
export type InventoryItem = {
  readonly id: string
  readonly sku: string
  name: string
  quantity: number
  description: string
  location: {
    building: string
    shelf: string
  }
}
// app/routes/_index.tsx
// UI for displaying an inventory item.
// Currently the SKU is not rendered.
<div
key={item.id}
className="..."
>
<p>Name: {item.name}</p>
<p>Description: {item.description}</p>
<p>Quantity: {item.quantity}</p>
<div>
<p>Location</p>
<div className="...">
<p>Building: {item.location.building}</p>
<p>Shelf: {item.location.shelf}</p>
</div>
</div>
</div>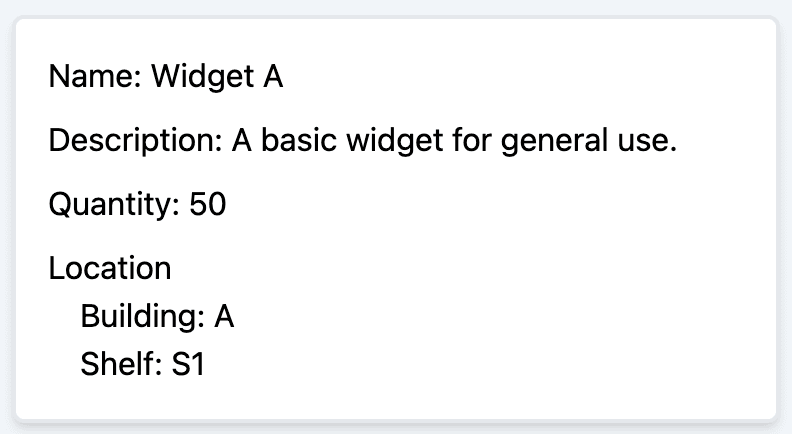
Server-to-Client Feature Flag
We'll implement our first feature flag to show or hide the SKU based on an environment variable. First, ensure you have an .env file in the root of your project. Remix will inject the values from this file into your development server. To add environment variables to your production application refer to your hosting provider's docs.
// .env
SHOW_ITEM_SKU="true"
If my .env file had any API keys or secret values, I would add this file to my .gitignore. To state the obvious, you never want to push secrets up to GitHub. Anyone who can see your repo can see your api keys and secrets. For this example, I have nothing to hide, and I want my.env in Github so y'all can see it.
Next, we'll add typescript support for this environment variable. This is optional, but I find defining types is almost always worth the effort. In a Typescript and Node application you can provide type information about the node environment. This is useful for autocomplete in your IDE. You can create a file named global.d.ts file in the app directory. In this file you can add type information to the NodeJS namespace. In the Process namespace we'll declare a type for our environment variable.
// app/global.d.ts
type FeatureFlagValues = 'true' | 'false'

declare namespace NodeJS {
    export interface ProcessEnv {
        SHOW_ITEM_SKU: FeatureFlagValues;
    }
}
In the Node context you can access environment variables with process.env. Remember Remix executes loaders on the server, so we have access to our Node environment. We can read process.env.SHOW_ITEM_SKU in a page's loader function. We return the environment variables value and have a reference in our page component.
// app/routes/_index.tsx
export const loader = () => {
    // in lieu of a fetching from an external source...
    const inventoryItems = inventoryList

    const showItemSku = process.env.SHOW_ITEM_SKU;

    return { inventoryItems, showItemSku }
}
Notice we get type support from our IDE because we added a type definition to ProcessEnv for the NodeJS namespace.
Depending on the value of our environment variable we can show or hide the SKU.
// app/routes/_index.tsx
export const InventoryPage = () => {
  const { inventoryItems, showItemSku } = useLoaderData<typeof loader>();

  return (
    <div key={item.id} className="...">
      <p>...</p>
      {showItemSku ? <p>SKU: {item.sku}</p> : null}
      <div> ... </div>
    </div>
  );
};
Client-Side Context and Feature Flags
Let's refactor our example by abstracting out the list item. We'll move our list item code into a component called <InventoryItem/>. It accepts an inventory item as a prop and returns our list item component.
We could pass the value of SHOW_SKU_ITEM as a prop and call it a day. For the sake of a real-life example let's imagine there are several pages rendering inventory items. We could load SHOW_SKU_ITEM in every loader that renders an inventory item, but this is repetitive and a perfect use-case for React Context. So, let's initialize context in the root of our application so we can read the feature flag value in any component.
// app/context/FeatureFlagContext.tsx
import { ReactNode, createContext, useContext } from 'react'

type FeatureFlagContextType = {
    showItemSku: boolean
}

export const FeatureFlagContext = createContext<
    FeatureFlagContextType | undefined
>(undefined)

export const FeatureFlagProvider = ({
    value,
    children,
}: {
    value: FeatureFlagContextType
    children: ReactNode
}) => {
    return (
        <FeatureFlagContext.Provider value={value}>
            {children}
        </FeatureFlagContext.Provider>
    )
}

export const useFeatureFlagContext = () => {
    const context = useContext(FeatureFlagContext)
    if (!context) {
        throw Error(
            'useFeatureFlagContext must be rendered within a FeatureFlagProvider'
        )
    }
    return context
}
Lets also fetch our environment variable in the root loader.
// app/root.tsx
export const loader = () => {
    const showItemSku = process.env.SHOW_ITEM_SKU === 'true'

    return { showItemSku }
}

export default function App() {
    const { showItemSku } = useLoaderData<typeof loader>()

    return (
        <html lang="en">
              ...
            <body>
                <FeatureFlagProvider value={{ showItemSku }}>
                    <Outlet />
                </FeatureFlagProvider>
            </body>
        </html>
    )
}
Next, we access the context in our component and conditionally render the SKU.
// app/components/InventoryItem.tsx
export const InventoryItem = ({ item }: { item: InventoryItemType }) => {
    const { showItemSku } = useFeatureFlagContext()

    return (
        <div
            key={item.id}
            className="..."
        >
		  	...
            {showItemSku ? <p>SKU: {item.sku}</p> : null}
            ...
        </div>
    )
}
Fetching environment variables in our root loader and using React Context to access values is a simple pattern for implementing client-side feature flags.
Use Feature Flag to Gate a Page
For our last example we are going to add a new route to the application. The new route will render serialized pages for each item. Each list item will acts as a link to its item page. I'll skip the code in the blog, but you can check the changes in this commit.
Let's imagine our designer and PM are not ready to release this page for our users. The PM doesn't want list items to act as links, and they want the user to see a 404 if they navigate directly to an item page via the URL. The engineering team has already completed work and wants to avoid stashing their progress in a feature branch. With a simple feature flag, both parties can get what they want. We can accomplish this with our FeatureFlagContext and a loader response.
First we'll add a new environment variable, types, and context. I'll skip the code example, but you can read this commit to follow along. The variable will be named SHOW_ITEM_PAGE and have a value of false.
Next, in our loader for the item page, we'll check the environment variable and throw a Not Found response if SHOW_ITEM_PAGE is set to false.
// app/routes/inventory.$id.tsx
export const loader = ({ params }: LoaderFunctionArgs) => {
  ...
  const showItemPage = process.env.SHOW_ITEM_PAGE

  if (!showItemPage) {
      throw new Response(null, {
          status: 404,
          statusText: 'Not Found',
      })
  }
  ...
})
Because we are checking the environment variables value in the loader, the page will throw a 404 not found before any UI is rendered in the browser. This is useful if you don't want user to navigate directly to a page via the URL.
Just like before, we can load the new environment variable in our client side context. This will allow us to render a link or not based on the value of SHOW_ITEM_PAGE. Again I'll skip the example to avoid repeating myself in this blog.
You can test this out by changing the value in the .env file and restarting the dev sever. If the value is false, nothing will change. If true, the inventory cards will be clickable links to the new serialized inventory pages.
Conclusion
And that's it! The code for the route is deployed but hidden for our end users. This can easily be changed by modifying our environment variable and deploying our application or infrastructure.
There are many other use-cases where this pattern can be useful. If you would like to chat about them or other frontend topics you reach me at alex-greco-dev@gmail.com.